Introduction
This document provides a quick guide for Carriers and Vendors explaining how to setup user and company preferences using the One Network system.
User Preferences
- Login to the One Network system.
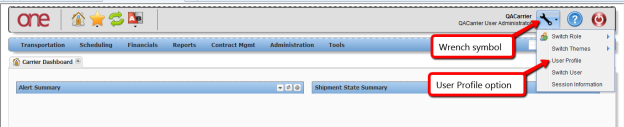
- User preferences are defined on the User Profile screen. To access the User Profile screen, click the wrench symbol located in the top right corner of the main screen and then select the User Profile option.
- The User Profile screen will be displayed.
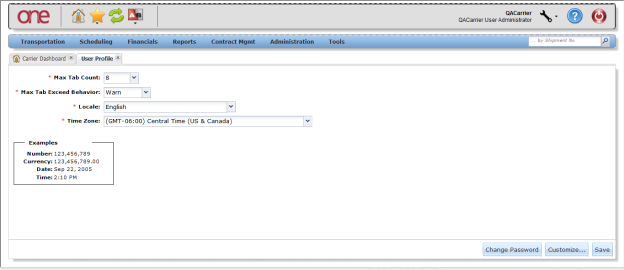
On the User Profile screen, there are 4 main fields: Max Tab Count, Max Tab Exceeded Behavior, Locale, and Time Zone.
Max Tab Count This parameter defines the number of maximum tabs that can be displayed on the system's main screen. Choices in the drop-down list consist of 8, 10 or 12. Max Tab Exceeded Behavior This parameter defines what the system should do once the maximum number of opened tabs is reached. Choices in the drop-down list consist of Warn or Auto Close. Using the Warn setting displays a warning message once a new tab is attempted to be opened which would exceed the Max Tab Count – user then has to close one or more tabs to open the new tabs. Using the Auto Close setting will close the earliest—opened tab once a new tab is opened that exceeds the Max tab Count – the number of tabs opened will be kept at the Max Tab Count. Locale This parameter defines the user's language. Time Zone This defines the user's time zone. - To set other user preferences, click the Customize button on the User Profile screen.

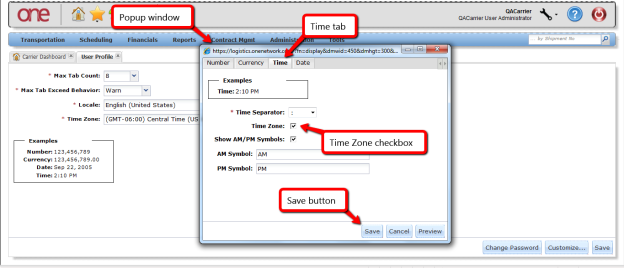
A popup window will be displayed with 4 tabs: Number, Currency, Time, and Date. Each of these tabs contains different user preference settings.
On various screens within the system, dates and times are listed such as on the Shipment Summary screen and the Appointment Details screen.
Users can set a preference in the system so the associated time zone is displayed with these dates and times.
- Select the Time tab and then select the check box next to the Time Zone field and then click the Save button.