Introduction
This document provides an explanation of how to add a user to your company. Only a user with administrative privileges can add a user and user role. Prior to adding a user, a user role first needs to be created.
Adding a User Role
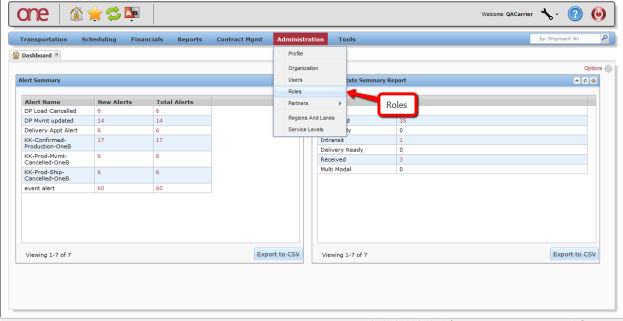
- Login to the One Network System.
- Select Administration -> Roles.
- The Roles screen will be displayed with a list of the current roles.
To add a user role, press the Add Role button.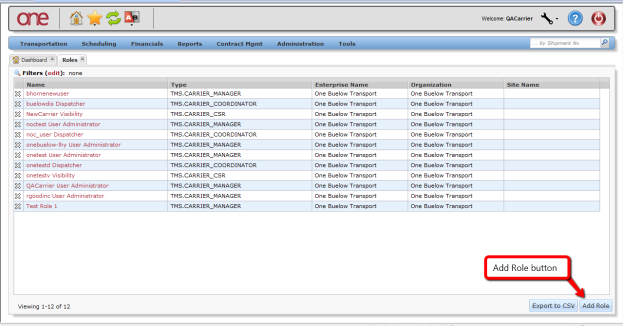
- The Add Role screen will be displayed.
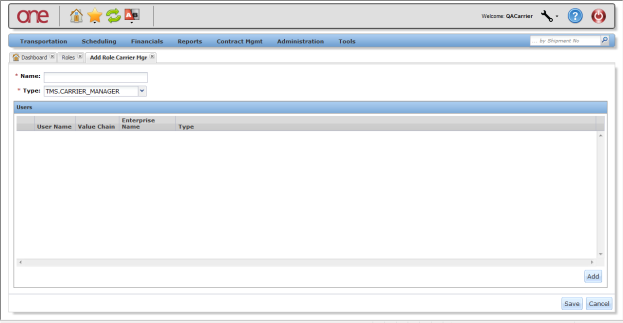
Enter information in the various fields to add the user role.
Fields marked with an asterisk symbol (*) are required.
- Name field - Enter the name for your role. Note: This will be the name of the role that will be used later when you add a user.
- Type field - Select one of the available user role types from the drop-down list. The choices include "Manager", "Coordinator" or" CSR" (Customer Service Representative). Note: A "Coordinator" and a "CSR" do not have administrative privileges.
Once all information has been entered, click on the Save button at the bottom of the screen. You will receive a message that the user role was successfully created.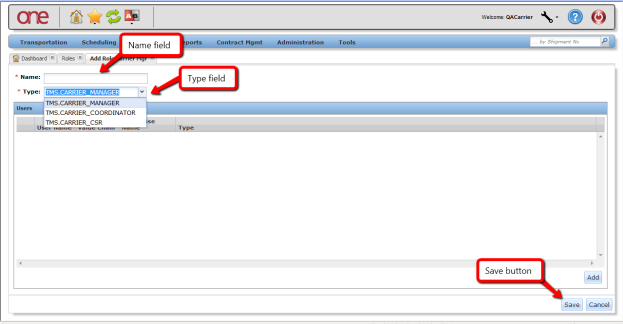
Adding a User to Your Company
- Login to the One Network System.
- Select Administration -> Users.
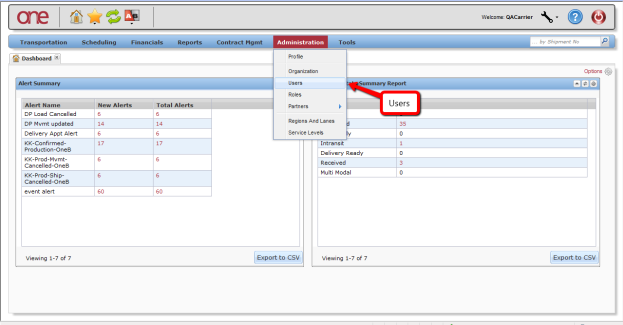
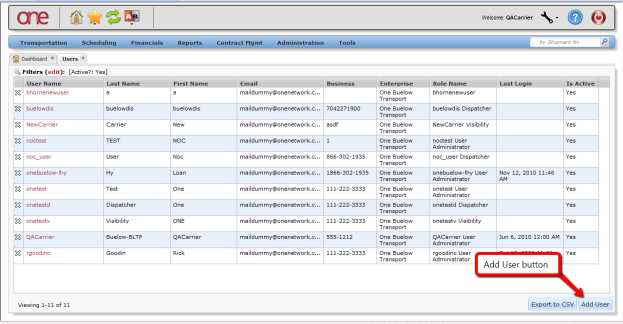
- The Users screen will be displayed with a list of the current users. To add a user, press the Add User button.
- The New User screen will be displayed.
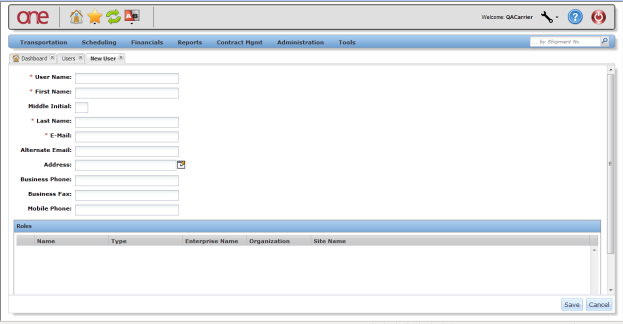
Enter information in the various fields to add the user.
Fields marked with an asterisk symbol (*) are required
• User Name field - enter a username in the User Name field.
This will be the username that the person will use to login to the One Network system. Usernames need to be unique in the One Network system. The user will need to enter this name exactly as it is entered in the User Name field when logging in to the One Network system.
• First Name and Last Name fields - enter the user's first and last name in these fields
• E-Mail field - enter the user's email address in the E-mail field. Note: This e-mail address will be used when the user needs to reset his password.
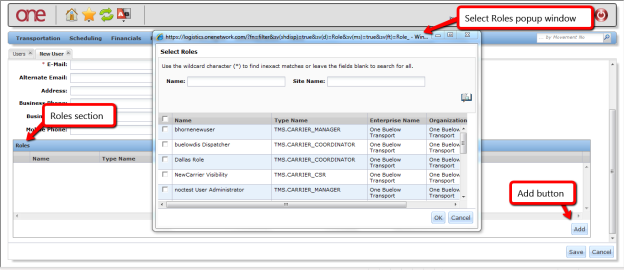
Scroll down to the bottom of the New User screen and click on the Add button under the Roles section. Note: Each user needs to have at least one role.
If there are no roles displayed after clicking on the Add button, refer to the first section in this guide on adding a user role.
In the Select Roles pop-up window, select the checkboxes for the roles to be assigned to this user and then click on the OK button on the popup window.
Once all information has been entered on the New User screen, click on the Save button at the bottom of the screen. You will receive a message that the user was successfully saved.