Quick Guide to Creating a Shipment Template |
|

Introduction
This document provides a quick guide explaining how to create a Shipment Template in the One Network System. A user can pre-define information on the New Shipment screen and then save this information as a Shipment Template. This Shipment Template can then be used at any time when creating a new shipment, and the information stored on the template will pre-populate on the New Shipment screen so the user does not have to manually enter it each time.
Creating a Shipment Template
- Login to the One Network System.
- Select Transportation -> New Shipment to open the New Shipment screen.
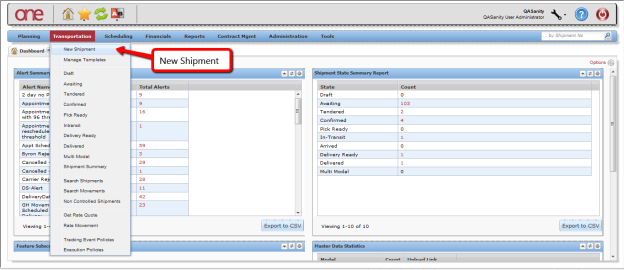
- The New Shipment screen will be displayed with the Header tab selected.
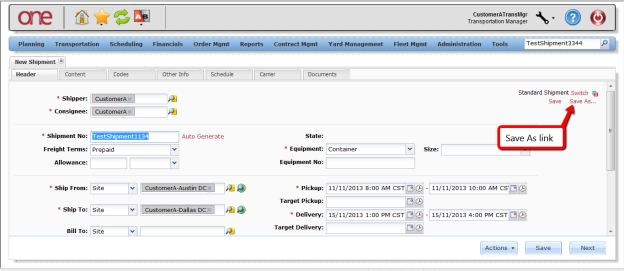
Enter information on the Header tab such as the following:
-
- Shipment No field
- Ship From Site field (note – the Shipper field will populate based on this information entered)
- Ship To Site field (note – the Consignee field will populate based on this information entered)
- Equipment field
- Pickup date/time range field
- Delivery date/time range field

- To enter information on the other tabs, first fill in information on the required fields on the Header tab. (Note – required fields are marked with an asterisk symbol). Once that is done, you can select any of the other tabs.
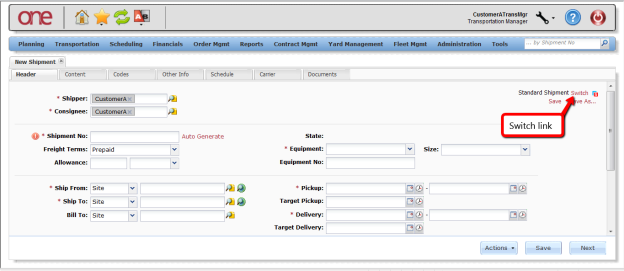
- Once the information has been entered that you want to save on a template to be used later, press the Save As link.
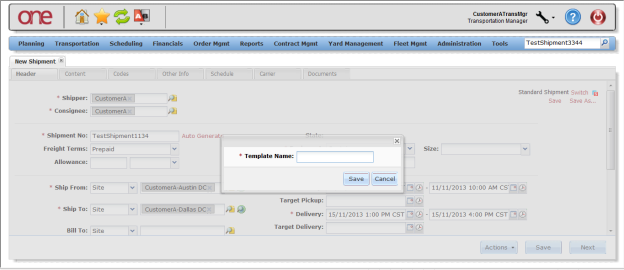
- A popup window will be displayed to enter the name for the template. Enter a name in the Template Name field and then press the Save button on the popup window.
- To use this Shipment Template, the next time the New Shipment screen is opened, select the Switch link.
- A popup will be displayed with the list of available templates. Choose your newly created template and then press the Select button on the popup.
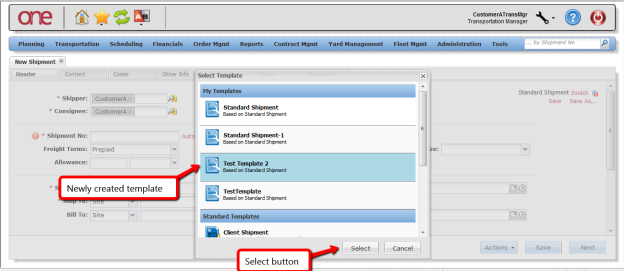
- The name of the chosen template will be displayed and the information stored in this template will be populated in the fields on the New Shipment screen.

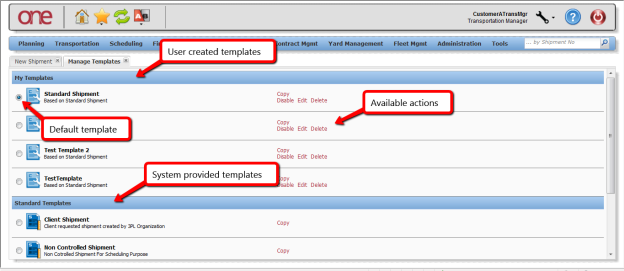
- A UI screen is available to help manage Shipment Templates. It is located at Transportation -> Manage Templates.
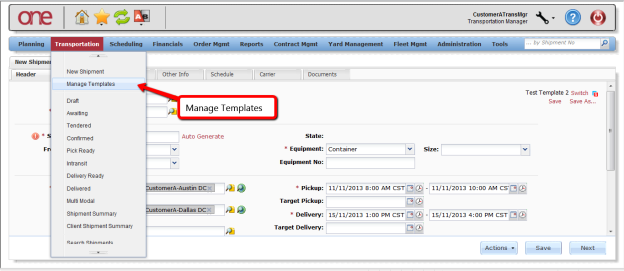
- The Manage Templates screen will be divided into two sections: My Templates and Standard Templates. The My Templates section will contain a list of the templates the user created. The Standard Templates section will contain a list of templates that come with the One Network system. For each template, there is a list of available actions that can be performed which include: Copy, Edit, Delete, and Disable. The default template that will be used when the New Shipment screen is opened will be identified by the selected radio button. The user can select a radio button next to any template that the user desires to be the default.