Quick Guide to Accepting or Rejecting a Tender |
|

Introduction
This document provides a quick guide for Carriers and Vendors explaining how to accept or reject a tender using the One Network system.
Accepting a Tender
- Login to the One Network system.
- Navigate to Transportation -> Tendered:
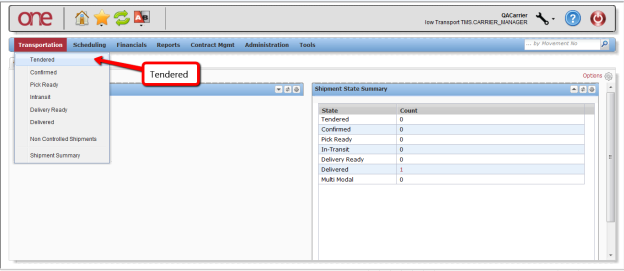
- The Tendered screen will be displayed with a list of the available tenders.
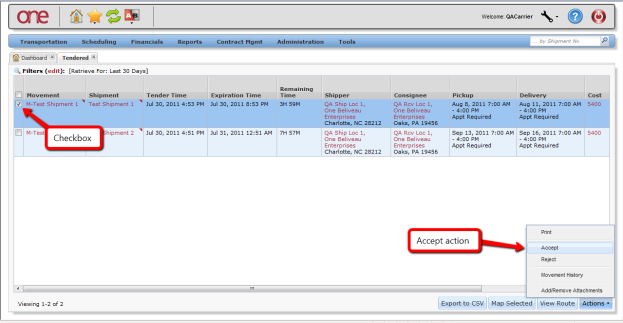
- To accept one of the tenders, select the checkbox located next to the desired tender and then select the Actions button on the bottom of the screen and select Accept:
- After selecting the Accept action, a popup window will appear to allow you to enter an optional Pro Number and/or an Equipment Number:
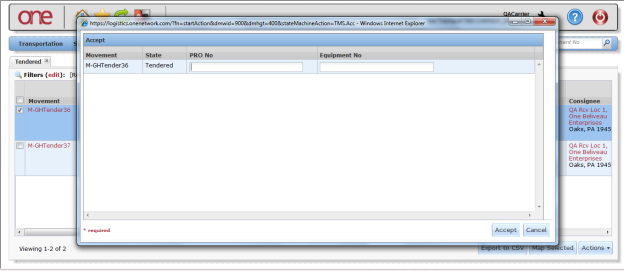
- Enter the desired information on the popup window and then press the Accept button on the popup window to finish accepting the tender.
Note: If you press the Cancel button on the popup window, this will cancel the acceptance of the tender that was in progress and will take you back to the Tendered screen. If you do not want to enter a Pro Number or Equipment Number, leave these fields blank on the popup window and then press the Accept button on the popup window to finish accepting the tender.
- Once you press the Accept button on the popup window, you will see a successfully accepted message on the popup window:
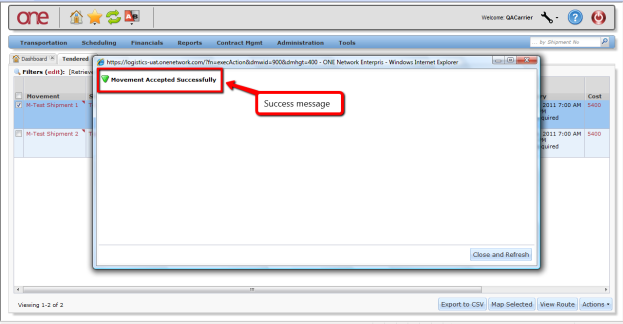
- Press the Close and Refresh button on the popup window to close this popup window and return to the Tendered screen.
- You will be returned to the Tendered screen which will now be refreshed. The tender you have accepted will no longer be displayed on the Tendered screen.
- Since you have now accepted this tender, it will be displayed on the Confirmed screen found under the Transportation menu.
Rejecting a Tender
- Login to the One Network system.
- Navigate to Transportation -> Tendered:
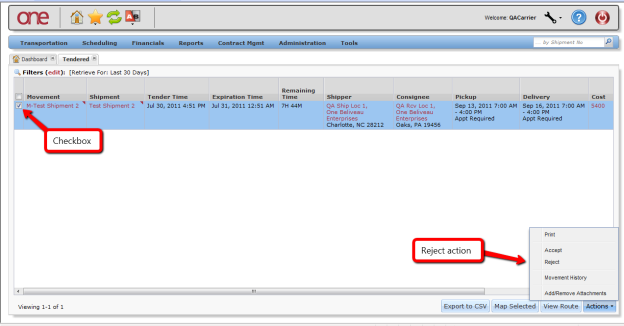
- The Tendered screen will be displayed with a list of the available tenders.
- To reject one of the tenders, select the checkbox located next to the desired tender and then select the Actions button on the bottom of the screen and select Reject:
- After selecting the Reject action, a popup window will appear for you to enter the reason you are rejecting the tender.
Note: Fields marked with an asterisk symbol ![]() are required.
are required.
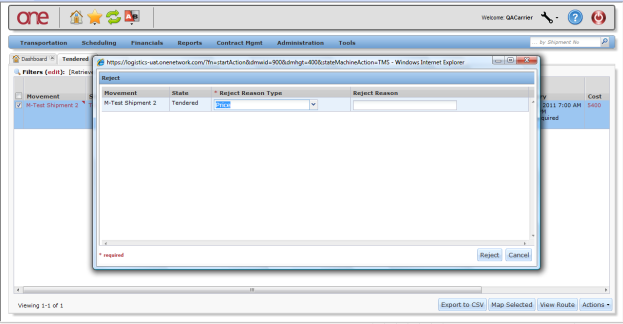
- For the Reject Reason Type field, select from one of the available entries in the drop-down list. In addition, you can also enter information in the Reject Reason field which is a text field and is optional.
- Once you completed selecting the Reject Reason Type and entering any desired information in the Reject Reason field, press the Reject button on the popup window to finish rejecting the tender.
Note: If you press the Cancel button on the popup window, this will cancel the rejection of the tender that was in progress and will take you back to the Tendered screen.
- Once you press the Reject button on the popup window, you will see a success message on the popup window:
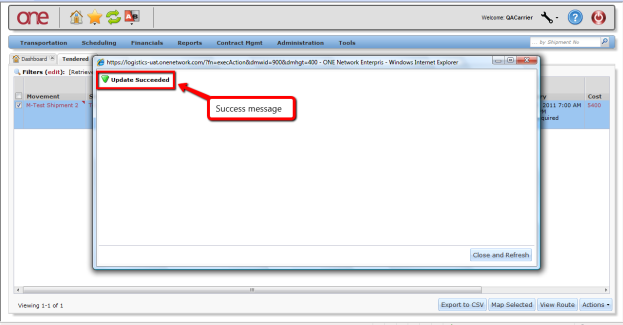
- Press the Close and Refresh button on the popup window to close this popup window and return to the Tendered screen.
- You will be returned to the Tendered screen which will now be refreshed. The tender you have rejected will no longer be displayed on the Tendered screen.