Introduction
The Movement Details screen provides page explains the capability for a user to add or consolidate Shipments shipments to a Movementmovement. The Movement Detail screen page has a Load Builder functionality which pictorially represents the current Movement movement with respect to its Equipmentequipment's capacity. It also provides an easier way to build the equipment to its full capacity by suggesting possible Shipment shipment candidates and displaying the impact to the Movementmovement's capacity when adding additional Shipmentsshipments.
Using the Load Builder Functionality
- Login Log on to the One Network Systemsystem.
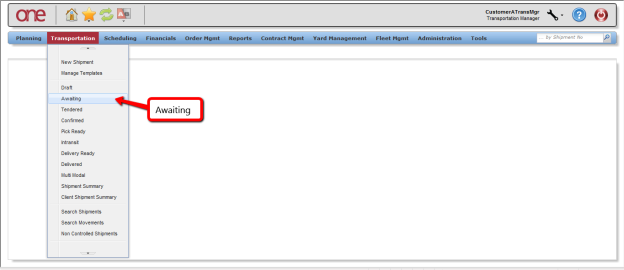
- Navigate to Click Transportation > Awaiting and locate a single–shipment Movement movement or multi-shipment Movement movement on the screenpage.

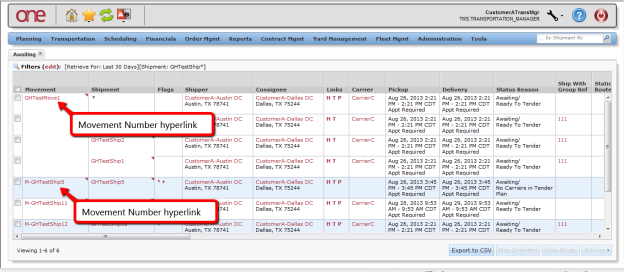
- Select a Click the Movement Number hyperlink to display the associated Movement Details screen page.

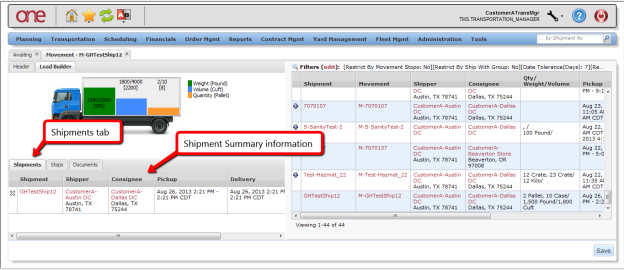
- The Movement Detail screen will be displayed Details page is displayed and is divided into multiple windows with tabs:
- The window located in the upper-left part of the screen page under the "Header" tab will contain contains information on the Movement along with movement and the associated Movement Numbermovement number.


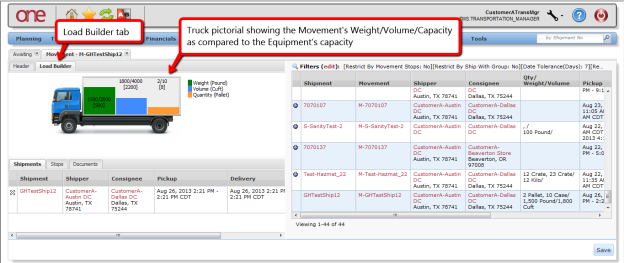
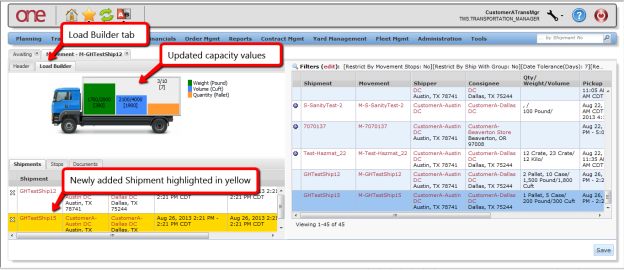
- When you click the Load Builder tab, the window displays Selecting the "Load Builder" tab in this window will display a pictorial representation of a truck and inside the truck will be bar graphs showing the Movement's truck.
- The truck contains the following information in a graphical view as compared to the equipment's weight, volume, and quantity capacity:
- Movement Weight (in green)
- Volume (in blue)
- and
- Quantity (in orange).
- as compared to the Equipment's Weight/Volume/Quantity capacity. For each bar graph, there will be are three capacity numbers – the :
- The first
- represents the
- movement's value
- .
- The second
- represents the
- equipment's value
- .
- The third represents the remaining capacity.
For example, in the
- screenshot below, for the
- weight bar graph, the
- movement's weight is 1500 pounds,
- The equipment's weight capacity is 2000 pounds and the remaining truck's weight capacity is 500 pounds.
- Shipments can be As shipments are dragged and dropped from the right side of the screen onto the truck pictorial , these quantities will be updated to show the user how adding that shipment impacted capacity. to update the quantities of the shipment. This helps the user build to load a truck to its full capacity.

- The window located in the lower left part of the screen page under the "Shipments" tab will display Shipments tab displays the shipment summary information for the shipments under this Movement.

- The window located on the right part of the screen will list the page is the list of available shipments. This
- The list of shipments contains those shipments that have the same or compatible Equipment equipment and Service Level service level as the selected Movementmovement.
- By default, this window shows those shipments whose "Pickup Date Range Start" is within +/- 7 days as compared to the "Pickup Date Range Start" of the selected Movementmovement.
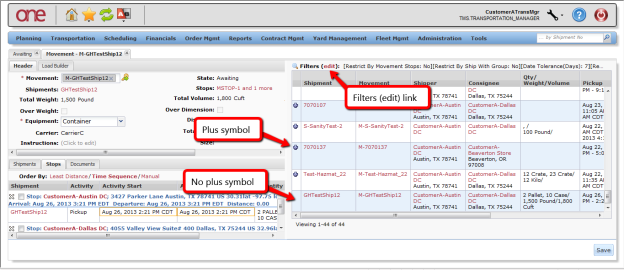
To display shipments with an increased date range,
selectclick on the "Filters (edit)" link
on this windowand modify the "Date Tolerance (Days)" field
(Note – this.
)Note This field can only be modified to a maximum of 30 days
.
- The shipments listed with the "plus" symbol are ones that are available and can be added to the Movement while those movement.
- The shipments listed without the "plus" symbol are the ones that are already associated with this Movementmovement.

- Add To add an additional shipment to the Movement. This can be done by selecting the "plus" symbol movement:
- Click the plus symbol next to an available
- shipment
- Drag and drop a shipment onto the truck symbol under the
- Load Builder
- tab window (upper left window)
Drag and drop the shipment onto the
Shipments
tab window (lower left window).
Note
The newly added shipment
is highlighted in yellow in
the Shipments
tab window. In
the Load Builder
tab window, the
capacity is updated to reflect
the additional shipment added to the
- The window located in the upper-left part of the screen page under the "Header" tab will contain contains information on the Movement along with movement and the associated Movement Numbermovement number.
- To confirm adding this Shipment to the Movement, press the Save button. A success message will be displayed.
movement

- Click Save to add the shipment to the movement. A success message is displayed.
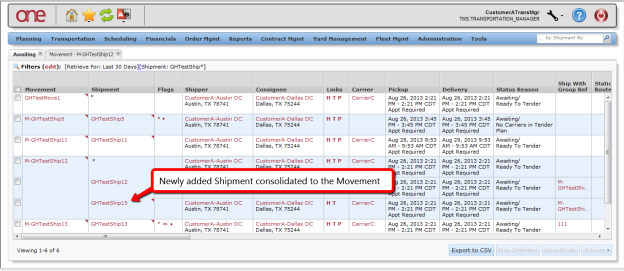
- Return to the Awaiting page and refresh the page to see the new shipment that is consolidated under the movement.
 The user can then return to the Awaiting screen and refresh the screen to see this new Shipment now consolidated under the Movement.