Introduction
This document provides a quick guide for Carriers carriers and Vendors explaining vendors on how to reschedule an appointment using the One Network system.
Appointment Rescheduling
- Login Log on to the One Network system.
- To find a shipment, click on Search.

- A Search By field and a Retrieve For field appearsFind your Shipment by first clicking into the Search box (located in the upper right-hand corner of the screen) as shown below:

When you first click into the Search box, you will see a "Search By" field and a "Retrieve For" field.
For the "Search By" field field, please be make sure that the drop-down choice is set to "Shipments: by Shipment Number".
For the "Retrieve For" field field, the default choice is "Last 30 Days" – if you want to . To look for shipments whose Pickup Date pickup date is older than 30 days, select one of the other choices from the drop-down list.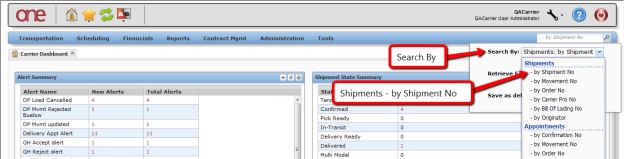

Type in your the PO number in the Search box
Warning icon false title Important When entering your the PO number in the Search box:
- If you are rescheduling for Safeway or Kroger, enter an asterisk
 symbol BEFORE (*) symbol before the PO number (for example, *123456)
 - If you are rescheduling for Dollar General, enter an asterisk (*) symbol AFTER after the PO number (for example, A1B2C3*)
- If you are rescheduling for Safeway or Kroger, enter an asterisk
- After entering your the PO number, hit the press the Enter key on your keyboard.
- A list of matching PO numbers will be is displayed. Find your the desired PO number which would be that is located under the Shipment column.
If rescheduling a pickup appointment, click on the Appointment Confirmation Number located under the Pickup column.
If rescheduling a delivery appointment, click on the Appointment Confirmation Number located under the Delivery column.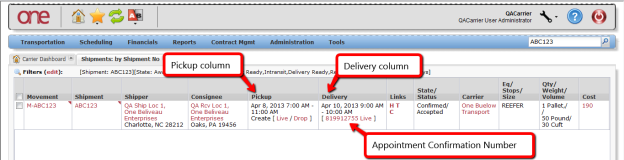

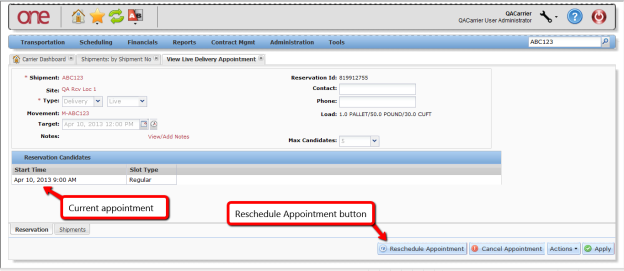
- An Appointment screen will then be page is displayed with the current scheduled appointment.
- To reschedule this appointment, click the on Reschedule Appointment button.

- A popup window will be pop-up window is displayed in order to specify the reason for rescheduling this appointment.
- Select one of the choices from the drop-down list under the "Reason Code" field and then click the Reschedule Appointment button on the popup window.
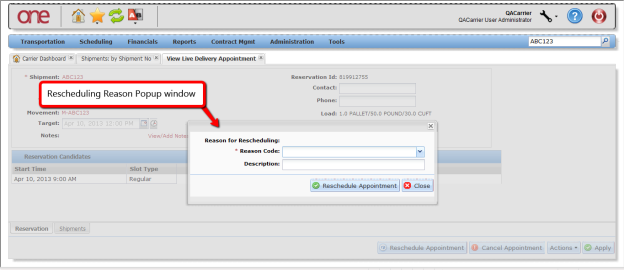
field. - Click on Reschedule Appointment.

- An Appointment page is displayed with a A list of available appointment times will be displayed.
- Select the radio button next to your the desired appointment time and then click the Save button on the bottom right corner of the screen to reschedule the appointment.
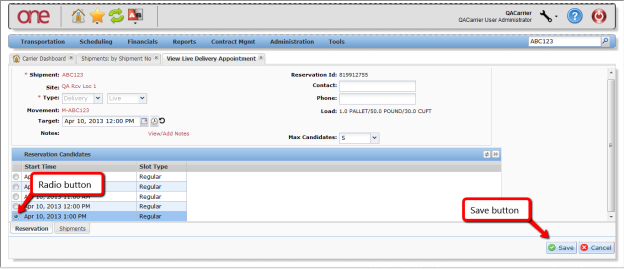
. - Click Save to reschedule an appointment.

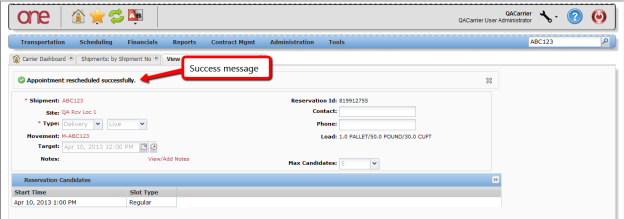
- A success message appears on the Appointment page along with the Reservation ID (confirmation number).
This confirms that the After clicking the Save button, you will see a success message on the Appointment screen.
This confirms your appointment has been rescheduled successfully.