Introduction
This document explain how to attach documents to a Shipment using the One Network system. This functionality allows you to attach any scanned document that is needed for a Shipment.
Attaching a Document to a Shipment
- Log in to the One Network system.
- Locate the Shipment or Movement to attach the document.
- There are two methods to locate the Shipment or Movement:
- Use Search field or
- Click Transportation > Confirmed, Intransit, or Delivered
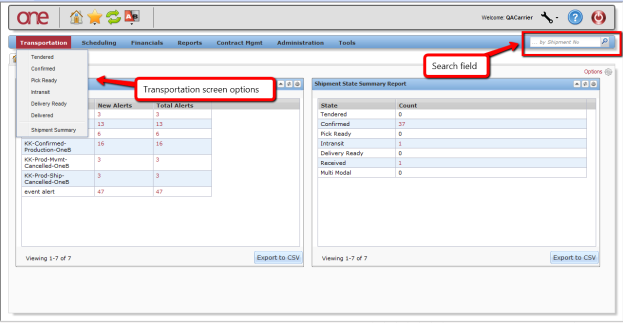
- A Search field (located at the top right of the page) is used as an example.
- When you click Search field, a Search By field and a Retrieve For field appears.
• For the Search By field, please choose the correct drop-down choice such as "Shipments: by Shipment Number".
• For the Retrieve For field, the default choice is "Last 30 Days" – if you want to look for shipments whose Pickup Date is older than 30 days, select one of the other choices from the drop-down list.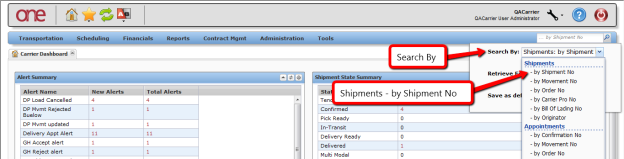
Type in your value in the Search field.
Important
When entering your value in the Search field, you can enter a wildcard symbol if you do not know or do not want to enter the entire value. The wild card is the asterisk * symbol, and you can enter it either before or after the value.
- The Movement/Shipment meeting the search criteria will be displayed:
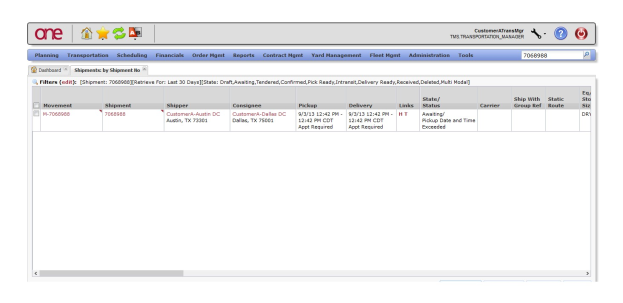
- To access the shipment information, click Shipment Number link located under the Shipment column. The Shipment Details page is displayed for this Shipment:
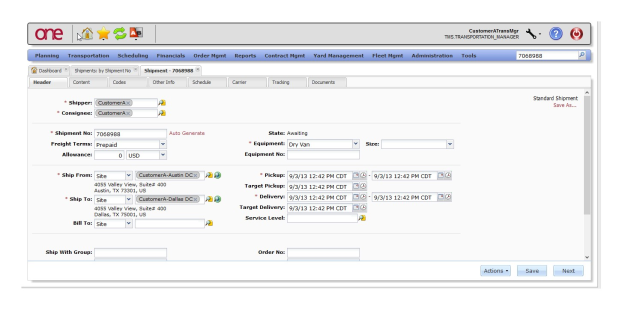
- Click on Documents tab.
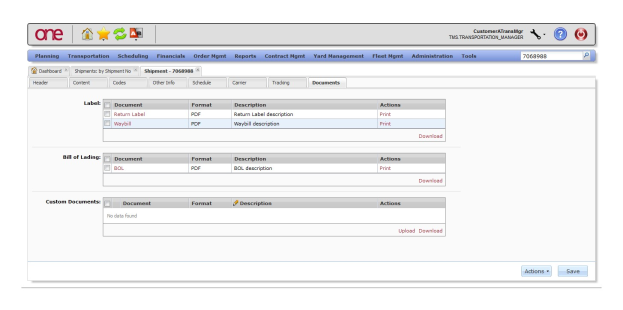
- To attach a document, click Upload link under the Custom Documents section and locate the document you want to attach. After attaching the document, Click Save (on the bottom right of the page).