Introduction
This document provides a quick guide on how to configure Transportation transportation-related policies in the One Network Systemsystem.
Configuring Transportation Related Policies
- Log in on to the One Network system.
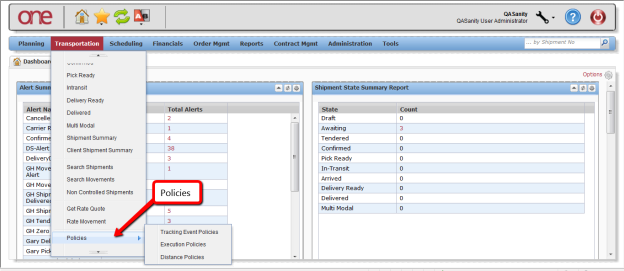
- Navigate to Transportation > Policies. Three Policies options are available: Tracking Event Policies, Execution Policies, and Distance Policies.

Configuring Tracking Event Policies
- Select Navigate to Transportation > Policies > Tracking Event Policies.
- The Tracking Event Policies page is displayed. There are two tabs at the top of the screen: Movement Events and Shipment Events. The Movement Events tab lists those Tracking Events that would be tracking events that are available at the Movement movement level, and the Shipment Events tab lists those Tracking Events that would be the tracking events that are available at the Movement shipment level.
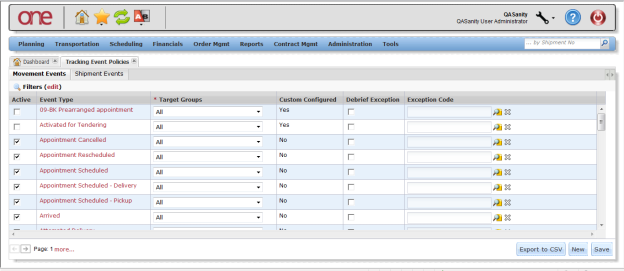

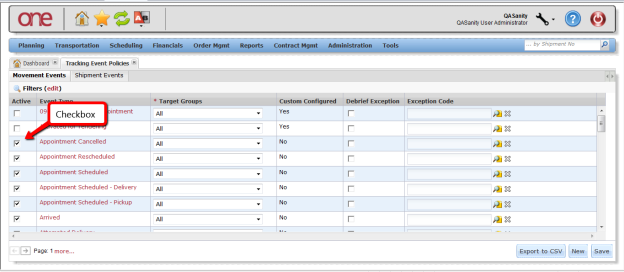
To define which Tracking Events that will be displayed display the tracking events in the list of available Tracking Events tracking events at the Movement movement level and at the Shipment shipment level, set the checkboxes under the Active column by each desired Tracking Eventrequired tracking event.
Note This will be the list of Tracking Events tracking events shown when the user selects the Create Tracking Event button on the Movement Tracking or Shipment Tracking screen.

Info The One Network system comes with a group of predefined tracking events.
- Click New to pre-defined Tracking Events. To see the list of system-provided Tracking Events, press the New button. On the tracking events.
- Open the Create Movement Evt Config screen page or the Create Shipment Evt Config screen, for page.
From the Event Type
field, select thedrop-down list, select Standard Event Type
option from the drop down list. The.
Tracking EventsInfo The field next to this will then have a drop down list of the system-provided
andtracking events. When selecting one of these events from the drop down list, the fields for this event will be displayed
if they are required by the system or not.
theIf a field is required by the system, the user cannot make it optional. To configure the field to be displayed or not, select or deselect the check box for that field name under
columnthe Active
column.
Note For a system-provided Tracking Eventtracking event, the user can define if they want a non-required field to be required by selecting the check box checkbox next to that field name under the Required column.
Tracking Event byInfo The user can configure the fields for a
thetracking event by Partner Type. To define the Partner Type, select one of the options from
fieldthe Target Groups
field drop-down list.
Tracking EventsInfo The user can create custom
Partnerstracking events and configure the required and optional fields for different
Tracking Eventspartners. These custom
thattracking events are meant to be information only, and they will not execute any business logic when selecting
an event.
To create a custom tracking event,
press theclick New
button.
The
screen will be displayed (Note – if selecting the New button fromInfo The Create Movement Evt Config
thepage is displayed. If you click New from the Shipment tab,
screen will bethe Create Shipment Evt Config
)page is displayed
.
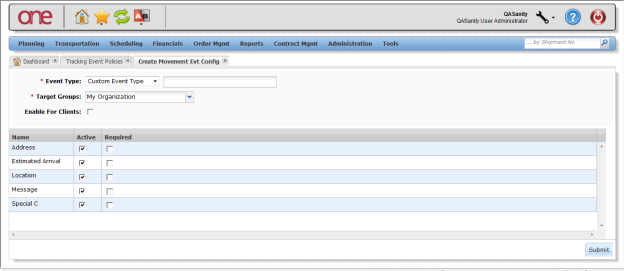

- For From the Event Type field drop-down list, select the Custom Event Type option from the drop-down list, and enter a name for the custom Tracking Event tracking event in the text field next to the drop-down list.
- Select an option from the From the Target Groups drop-down list to , define who can view and operate on this custom Tracking Eventtracking event. Options include "My Organization", "Carrier Partners", "Customer Partners", "Supplier Partners", "Carrier and Customer Partners", "Carrier and Supplier Partners", "Customer and Supplier Partners", "All Partners", and "All".
- Select the required fields you would like to be displayed for this custom Tracking Event tracking event by selecting clicking the respective check box by the associated field name under the Active column. If you also want a field to be required, select the check box for that field For required fields, click the necessary fields under the Required column.
- Press the
Click Submit
button toto create the
Custom Tracking Event.custom tracking event.
Movement or Shipment Tracking EventNote A
anmovement or shipment tracking event can be configured to raise
inan Exception Request
Thesein response to that event occurring.
canThese Exception Requests
Carriercan then be used by the Transportation Controlling Organization and the
carrier to capture details that justify the deviation from the standard, expected process.
that the Carrier would like to requestInfo Exceptions are events that occur
frombased on which carrier requests an exemption
Carrier, so that the
ancarrier is not penalized accordingly. To associate
withan Exception
Movementwith a
Shipmentmovement or
firstshipment event, the user must
ancreate
andan Exception Code
Movement or Shipment Tracking Eventand then associate that code with a specific
screenmovement or shipment tracking event under the Tracking Event Policies
Tracking Eventpage. Once that
Carriertracking event is submitted by the
associatedcarrier, the
willassociated Exception
thatwill be raised
Hub can then view to see if theyto check whether the
Carrierhub can approve or deny the
Ancarrier's exception request.
canAn Exception
thrucan go
andthrough various states, which include: Pending, Approved, Denied, Deferred,
A Carrierand Appealed. Once
isa carrier Exception
theis raised, it will start in
statethe Pending
thestate. The Hub can approve or deny
whichthe Exception
thewhich will move it to
orthe Approved
stateor Denied
Carrierstate. Denied Exceptions can be viewed by the
deniedcarrier, who can appeal the
–denied Exception
appealed– these
wouldappealed Exceptions
thewould move to
statethe Appealed
arestate. Exceptions
Carrierare viewed by the
thecarrier on his dashboard using
portletthe Exception Request Summary
Hubportlet. A
thehub can defer looking at
untilthe Exception
deferreduntil a later time – these
woulddeferred Exceptions
thewould be moved to
statethe Deferred
state.
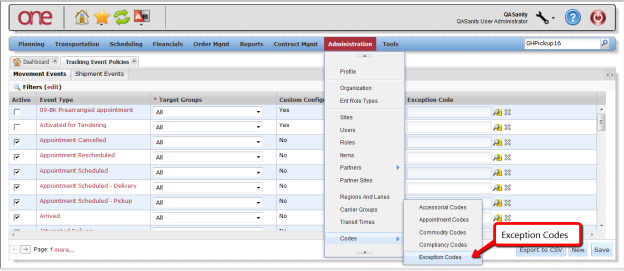
- To create an Exception Code, navigate to Administration - > Codes - > Exception Codes.

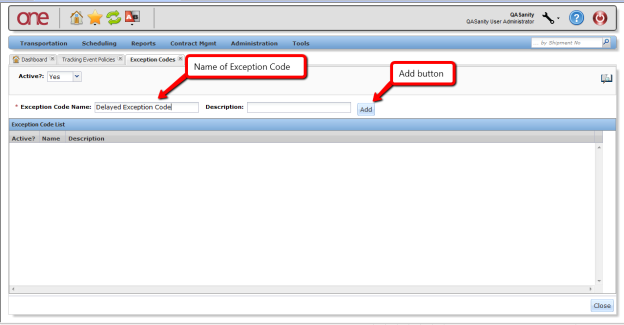
- On the Exception Codes screen page, enter the name for the exception in the Exception Code Name field and then press the click Add button.

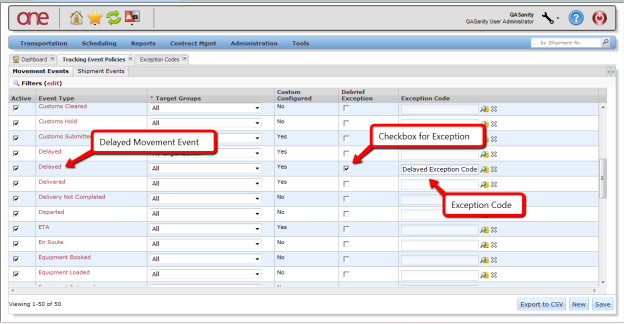
- To associate an Exception Code with a Tracking Eventtracking event, navigate to Transportation - > Policies - > Tracking Event Policies.
- To define a Tracking Event tracking event to raise an Exception Request when that event occurs, select the checkbox for the for Debrief Exception for the specific event and enter the Exception Code under the Exception Code column. Press the Save button to
Click Save to save this setting. This can be defined for a
Tracking Eventtracking event at the
Movementmovement level using the related tab, or at the
Shipmentshipment level by using its related tab.

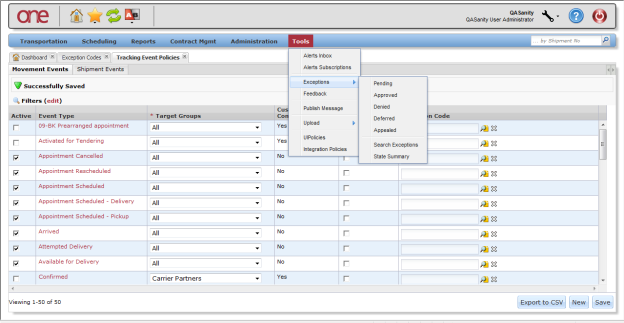
WhenInfo
Tracking EventWhen this exception-defined
Carriertracking event is added by the
an Exceptioncarrier,
Huban exception will be raised. The
these Exceptionshub can view
-these exceptionsby navigating to Tools
-> Exceptions
Hub> Pending. The
view Exceptionshub can also
their Stateview exceptions by
-state by navigating to Tools
-> Exceptions
-> State Summary or by navigating to Tools
-> Exceptions
> Search Exceptions.

ExceptionsInfo For pending
Hubexceptions, the
Exception if he is okay with it or he can deny it if he does not agree with it or he can defer it and look at it athub can either approve the
Carrierexception, deny it, or defer it to a later time. The
Exceptionscarrier has a similar view of these
Exceptionsexceptions and can view
Hub denied and for denied exceptions, he can appeal them. The Hub would then see theseexceptions that the
hub denied. The carrier can appeal denied exceptions. The hub can see these exceptions under the Appealed state.
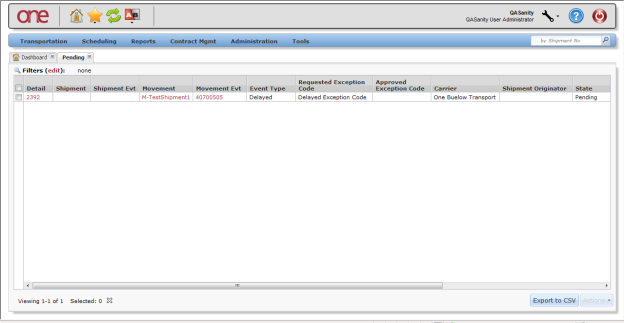
screen shotNote The following
Pending Exceptionscreenshot shows a
Carrierpending exception that was raised when the
Delayed Tracking Eventcarrier added a
Movementdelayed tracking event at the
Exceptionmovement level. Select the link exception number under the Detail column to go to the details of the
exception in order to perform an action.

the Exception Details screenInfo On
asthe Exception Details page, the Hub can select an action such
oras Approve
Carrieror Deny. The Hub can also add a comment that can be viewed by the
selectingcarrier by
buttonusing the Add
the Comments section and then can save that comment by pressing the Add Comment button onbutton in
screenthe Comments section. To save the comment, click Add Comment, which is at the bottom of the
page.
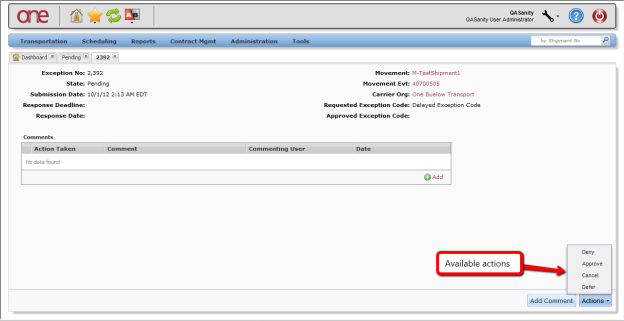

- After performing you complete one of the actions, the state of the Exception exception will change accordingly.


Configuring Execution Policies
- Select Transportation -To configure execution policies, click Transportation > Policies - > Execution Policies.
The Execution Policies
screen will bepage is displayed.

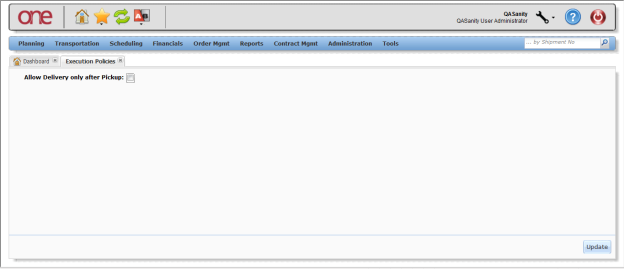
screen, there is a Policy named "Info On the
". IfExecution Policies page, if Allow Delivery only after Pickup
this Policy will enforce that a Pickupis set,
be donea pick-up action has to
Movement/Shipmentoccur on a
movement or shipment prior to performing a Delivered or Ready for Delivery action.
- To set this Policy, select the checkbox next to the Policy name and then press the Update buttonpolicy, click the Allow Delivery only after Pickup checkbox and click Update. A success message will be is displayed.
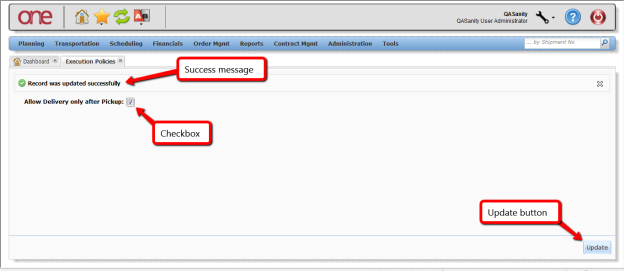

- With this Policy policy set, if the user then tries to perform a Delivered or Ready for Delivery action prior to having done a Pickup pickup action, the system will display an error message stating "Delivery/Delivery Ready action cannot be performed without Pickup action".
...
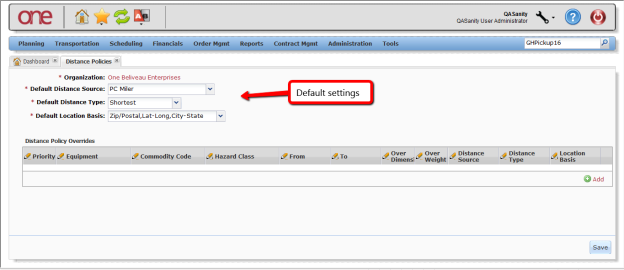
Configuring Distance Policies
- Select Transportation -To configure distance policies, click Transportation > Policies - > Distance Policies.
The Distance Policies
screen will bepage is displayed.


screenInfo The Distance Polices
Shipment/Movementpage allows the user to customize the distance calculations for the system to use based on
sayshipment and movement characteristics. For example, the user can add rules to
Shipmentsspecify that all hazardous
screenshipments should use practical route mileage, even when the default mileage is computed using the shortest route.
At the top of the
– thesepage, the default settings are defined
". These are required fields. The fields include:
"Default Distance Source
the ", such as "PC Miler" or "Mile Maker",
"Default Distance Type
,, such as "Practical"
etc.or "Shortest",
the "and
"Default Location Basis
, etc, such as "City-State, "Zip/Postal", or Lat-Long"
.
Note PC Miler and Mile Maker are third-party tools that the system uses to calculate postal-code-to-postal-code distances in the United States, Canada and Mexico.

On the bottom of the screen under theInfo
EquipmentUnder the Distance Policy Overrides section, the user can set override settings based on
Commodity Codeequipment,
Hazard Classcommodity code, "From (Country)", "To (Country)",
and thenhazard class, "Over Dimension" (Y/N) and "Over Weight" (Y/N)
, followed by the corresponding Distance Source, Type, and Location Basis.
To create a Distance Policy Override setting, press the click the Add link and enter information in each of the desired, editable fields (Note - these editable fields have required fields.
)Note Editable fields are marked with a pencil symbol
.
Note Not all of these settings need to be entered; the user can leave any setting blank.
PriorityInfo For each of these override settings, the user also needs to specify its
Numberspriority. Priority
e.g.numbers must be unique (
etc.for example, 1, 2, 3, and so on,
will usewith 1 being treated as the highest priority). If multiple overrides apply, the system
uses the one with the highest priority. Not all of these settings need to be entered. The user may leave any setting blank.

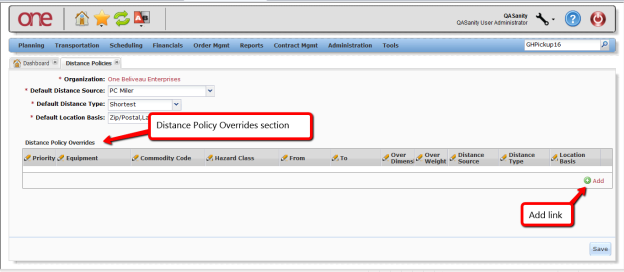
- Once the information has been is entered, press the click Save button to to save the Default default and Override override settings.