Introduction
This document provides a quick guide explaining explains how to create a Shipment Template shipment template in the One Network Systemsystem. A user You can pre-define information on the New Shipment screen page and then save this information as a Shipment Templateshipment template. This Shipment Template shipment template can then be used at any time when creating a new shipment, and the information stored on the template will pre-populate on the New Shipment screen so the user does page so you do not have to manually enter it each time.
Creating a Shipment Template
- Login Log on to the One Network Systemsystem.
- Select Click Transportation -> > New Shipment to open the New Shipment screen page.
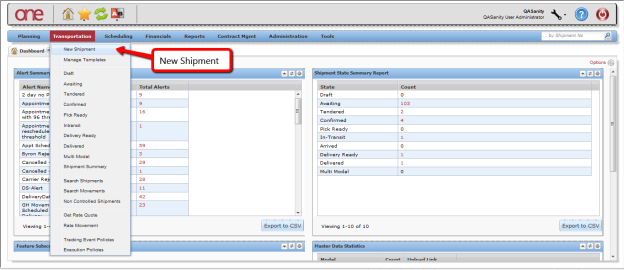

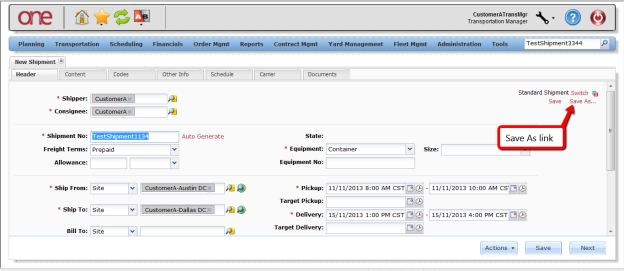
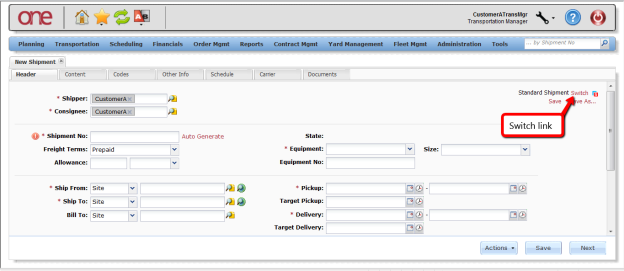
- The New Shipment screen will be page is displayed with the Header tab tab selected. Enter the following information on the Header tab such as the following tab:
- Shipment No field
Ship From Site
field (note – the Shipper fieldfield
thisNote The Shipper field will populate based on
)the information entered
.
Ship To Site field
(
– theNote
fieldThe Consignee
thisfield will populate based on
)the information entered
.
- Equipment field
- Pickup date/time range field
- Delivery date/time range field


To enter information on the other tabs,
firstfill in information
onfor the required fields on the Header tab.
(Note – required
)Note Required fields are marked with an asterisk (*) symbol
that is done. Once
filled, you can select any of the other tabs.
Click Save As to create a template.
Once the information has been entered that you want to save on a template to be used later, press the Save As link.Note This template can be used later.

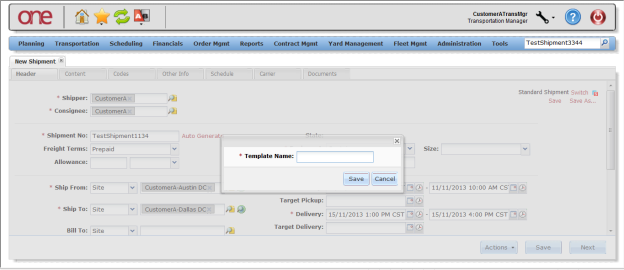
- A popup window will be is displayed to enter the name for the template. Enter a name in the Template Name field and then press the Save button on the popup windowclick Save.

- To use this Shipment Template, the next time the New Shipment screen is opened, select shipment template, when you open the New Shipment page next time, click the Switch link.

- A popup pop-up is displayed with the a list of available templates. Choose your the newly-created template and then press the click the Select button on the popuppop-up.
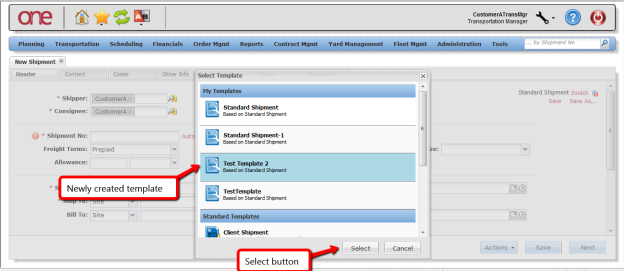

- The name of the chosen template will be is displayed, and the information stored in this template will be populated in the fields on the New Shipment screen page.


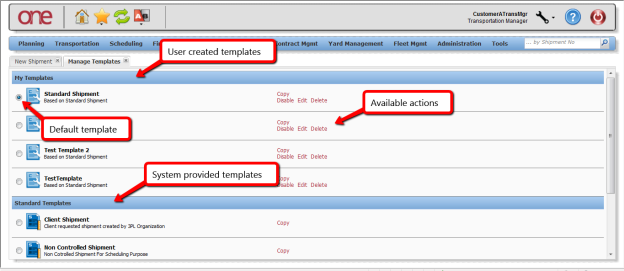
- A UI screen user interface page is available to help manage Shipment Templates. It is shipment templates, located at Transportation -> > Manage Templates.
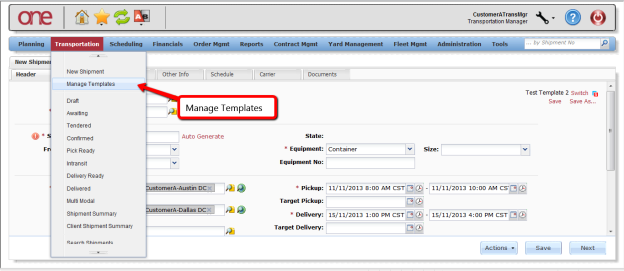

- The Manage Templates screen will be page is divided into two sections:
- My Templates
- Standard Templates
- . The My TemplatesTemplate section will contain contains a list of the templates the created by user created.
- The Standard TemplatesTemplate section will contain contains a list of templates that come with the One Network system. For each template, there is a
- Each template has list of available actions that can be performed which include:
- Copy
- Edit
- Delete
- Disable
- , Delete, and Disable. The default template that will be is used when the New Shipment screen page is opened will be identified by the selected radio button. The user You can select a radio button next to any template that the user desires to be the to set it as default.