Introduction
This document provides a quick guide explaining explains how to create a Lane in the One Network Systemsystem. A Lane defines a Ship From and Ship To location. A Ship From or Ship To location can be one of the following: a Country, a State, a City, or a Postal Code Range. The locations defined on a Lane can be as general as you want such as a Lane that goes from the US (i.e Country = US) to the US or it can be more specific such as a Lane that goes from a Ship From Postal Code to a Ship To Postal Code. Once you create a Lane, you can use this Lane in other functions in the system such as when you create a Route or a Contract Base Rate.
Creating a Lane
- Login Log on to the One Network Systemsystem.
- Select Click Administration - > Regions And Lanes:
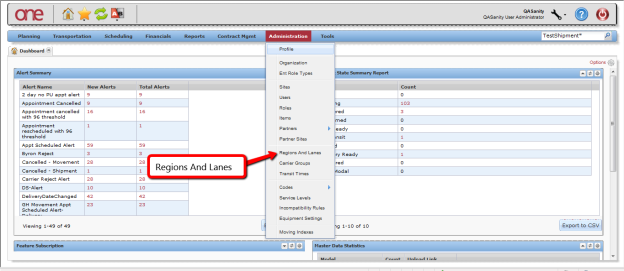

The Regions and Lanes screen will be page is displayed which has a Regions tab and a Lanes , Lanes tab, and Zones tab: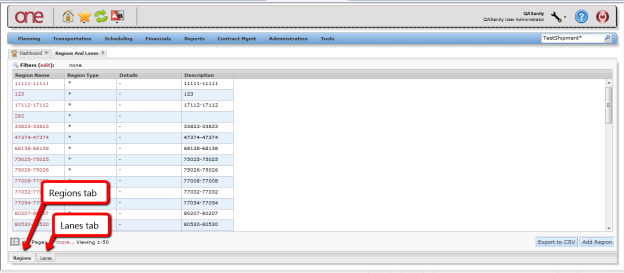

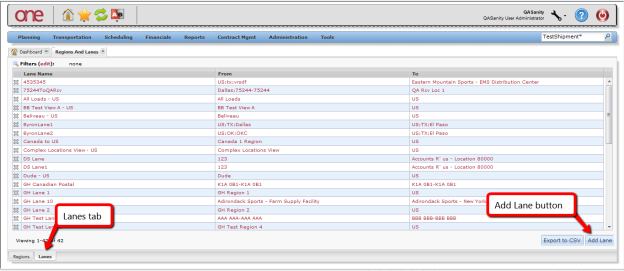
- To add a new lane, select Select the Lanes tab and then press the click Add Lane button:.

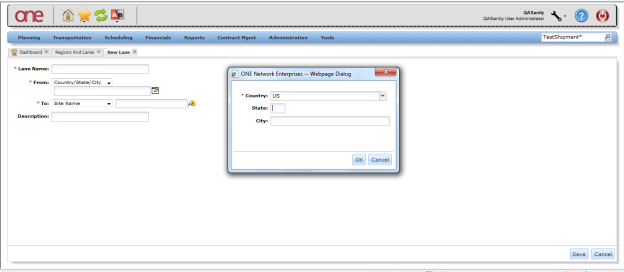
On the New Lane screenpage, enter information in the various fields to add the Lane.
Note Fields marked with an asterisk symbol * are required.
Lane Name field Enter a name for the Lane. From fieldFirst select the FromType such as From the From drop-down, select appropriate value. The drop-down consists of various location values such as Site, Partner Site, Country/State/City or , Postal Code Range. Using Country/State/City, you can specify just a Country - or a Country and a State - or a Country, State and City. After selecting the Country/State/City Type, choose the icon next to that field and specify the Country/State/City in the popup window and then press the OK button on the popup. When using Postal Code Range, you need to specify a range of postal codes. If you just want to specify one postal code, you would enter something such as "75222 – 75222". To field First select the To Type such as Country/State/City or Postal Code Range and then enter the values similar to what was done on the From field. 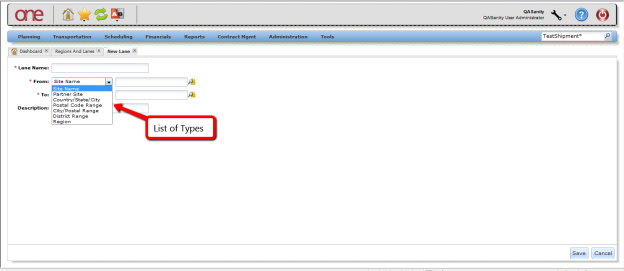
After entering your information on the New Lane screen, press the Save button at the bottom of the screen., City/ Postal Range, District Range, Region. Click on search icon next to the From field to select the address. To field From the To drop-down, select appropriate value. The drop-down consists of various location values such as Site, Partner Site, Country/State/City, Postal Code Range, City/ Postal Range, District Range, Region. Click on search icon next to the To field to select the address. 
- Click Create to store information about the lane.

You can create multiple Lanes. To view your Lanes, go to navigate to Administration - > Regions and and Lanes and and select the the Lanes tab tab.