Introduction
This document provides a quick explanation on explains how to create and manage a Carrier Contract and associated Rates in the One Network Systemsystem. A Carrier Contract carrier contract defines the rate that a Shipper will pay a Carrier shipper pays a carrier to move a shipment from one location to another location.
Creating a Carrier Contract and Associated Rates
- Login Log on to the One Network Systemsystem.
- Select Click Contract Mgmt - > Carrier Contracts.
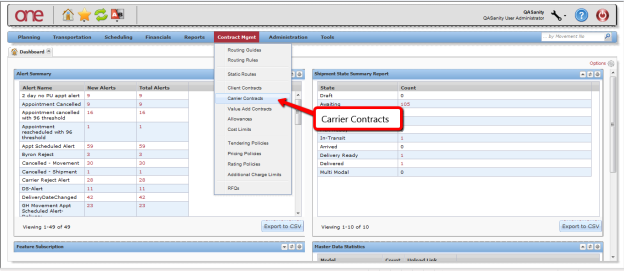
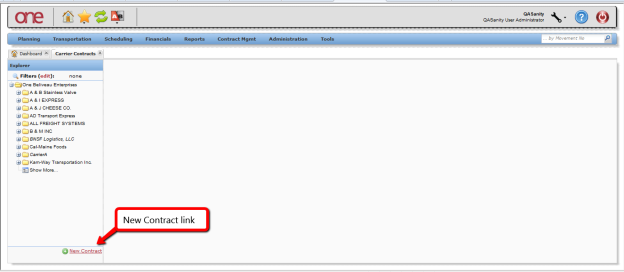
The Carrier Contracts screen page is displayed. On the left side of the screen is an Explorer window that contains The page contains Explorer window on the left side that displays a list of existing Carriers carriers and their Contractscontracts. The top item in the list will be is the name of your company, the next item in the list will be next is the name of a Carrier, expanding the Carrier carrier. If you expand the carrier, it displays a list of the contracts, and expanding a contract shows a list of the rates. Selecting any item in this tree structure displays that item's details on the right side of the screenpage.
- To add a new Carrier Contract, press the click New Contract link.
The Create Carrier Contract screen page is displayed.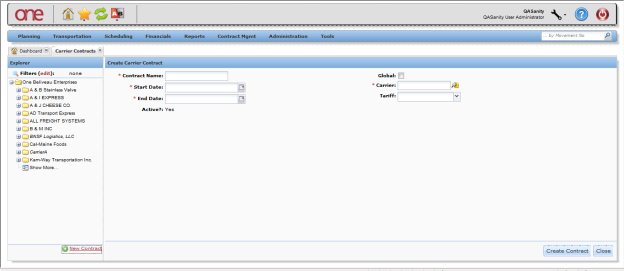
Fill in the information on the screenpage. Required fields are marked with an asterisk * symbol.
Contract Name field Enter the name for your Carrier Contractcarrier contract. Carrier field Enter the name of the Carrier company. This is an auto-complete field. As you start typing the name of your Carrier company, the auto-complete function will show shows you the first 10 ten matches which you can select one from or you can continue typing to narrow down your search. There is also a Search icon next to this field that allows you to search for a Carrier company. Start and End Date fields Enter the date range that this Carrier Contract would be in effect. Select the Calendar icon next next to each of these date fields to display a calendar to select the date. Tariff field Select a Tariff from the drop-down list if this contract is based on a specific Tariff. - After the information is entered on the screen, press the Save button at the bottom of the screen. After the Save button has been pressed, a success message will be Click Save after you enter all the required information. A success message is displayed.
- Refresh the screen and the . The new Carrier Contract is displayed in the Explorer window allowing you to enter rate information for this Carrier.
- In the Explorer window, expand the Carrier Contract to display the various Rate Types which include Base Rate, Discount Rate, Accessorial Rate, Stop Off Rate, and Split Rate.
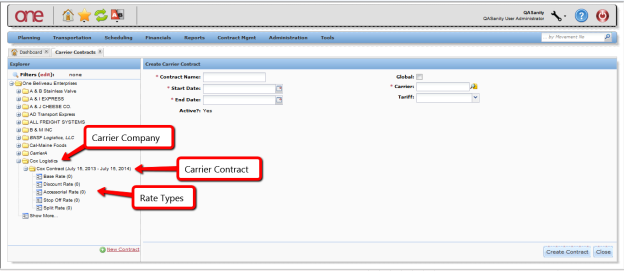
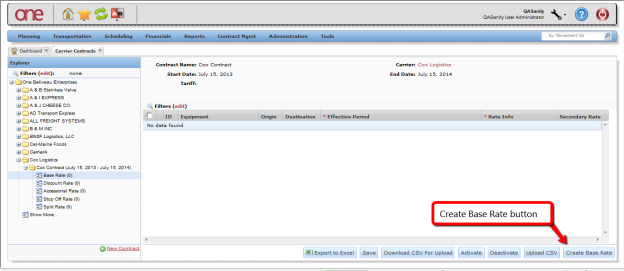
- Select any of these Rate Types to display the existing rates on the right side of the screenpage.
- To add a Base Rate, select the Base Rate Type link in the Explorer window and then press the Create Base Rate button.
The Create Base Rate screen will be displayed. Fill in the information on the screenpage is displayed. Required fields are marked with an asterisk * symbol.

Effective Period field Enter the date range that this rate will be in effect. The date range must be within the date range of the contract. Lane field Enter the name of the Lane being used. This is an auto-complete field.
Note – youNote You can select the New Lane link to create a Lane on the fly and manually specify the From and To locations.
Cost Type field Select the cost type from the drop down list. Available cost types include: Flat, Per Distance, Per Weight, Per Dimensional Weight, Per Volume, Supersede Wt/Vol, Per Shipping Unit, Per CWT, RateWare, Per CWT Dimensional Weight, and External Rating. Equipment field Select the equipment type from the drop down list. - After you enter all the required information is entered on the screen, press the Save button at the bottom of the screen, click Save.
- Refresh the Carrier Contract screen page and expand the Carrier Contract to see the new Base Rate added to the list.
- Repeat this process to add the various types of desired Rates.
Following is an example of required rates.
The following screen-capture shows the Create Discount Rate screen page: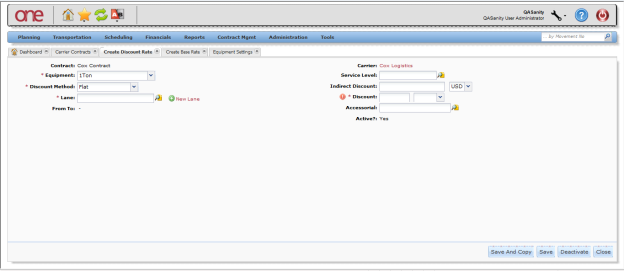
Following is an example of the Create Accessorial Rate screenThe following screen-capture shows the Create Accessorial Rate page: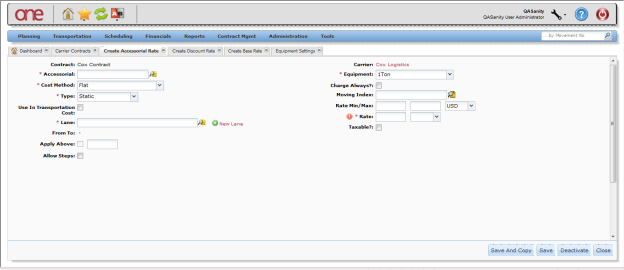
Following is an example of the Create Stop Off Rate screen:
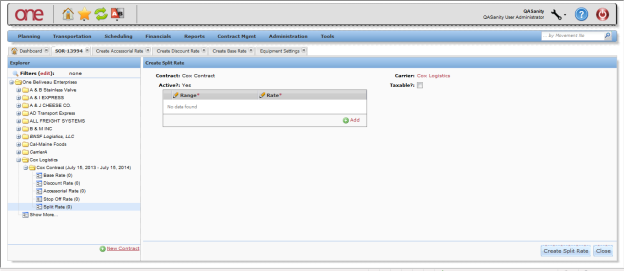
Following is an example of the Create Split Rate screen:The following screen-capture shows the Create Stop Off Rate page:
The following screen-capture shows the Create Split Rate page: