...
- Log on to the One Network system.
- To add a tracking event, first locate the Shipment or Movement you want to add the event to. You can locate the Shipment or Movement by using the Search field or you can go to one of the Transportation pages such as Confirmed, Intransit or Delivered and locate your Shipment or Movement.

- From the Transportation menu, click Confirmed.
The Confirmed page appears, displaying a list of confirmed shipments:

Info You can add a tracking event to an individual shipment or you can add a tracking event to a Movement. If the Movement contains multiple shipments, the tracking event added to the Movement will be added to every Shipment under that Movement
- In the Confirmed page example as shown below, there is a Movement that contains two shipments.
To display the Shipments under the Movement, select the expand/collapse arrow symbol by the movement number to expand or collapse the shipment information:
- To add a Tracking Event at the Movement, complete one of any of the following three methods:
• Method One:- Select the check box next to the Movement Number.
- Click Actions button at the bottom of the screen.
- Select Movement Tracking option.

• Method Two: Click T symbol on the movement number line.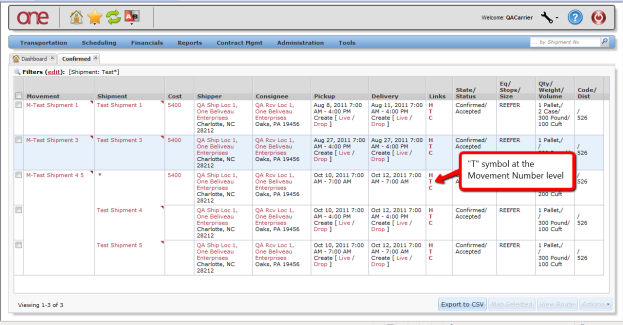

• Method ThreePaThree: Click the triangle symbol next to the movement number and click Movement Tracking action.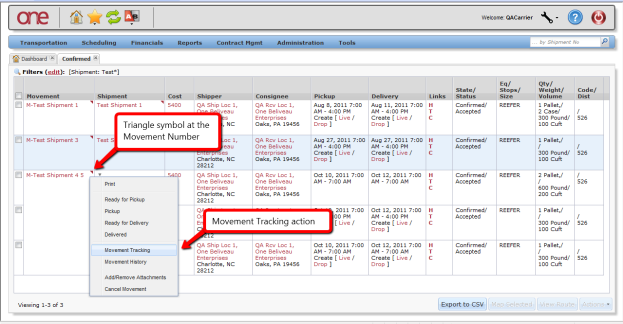

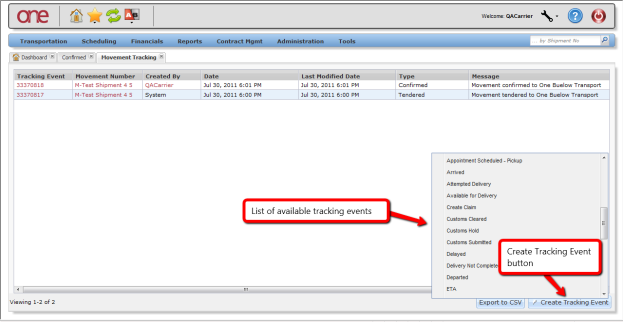
- After using any one of these three methods, the Movement Tracking Event page is displayed with the list of tracking events that are added to this Movement:
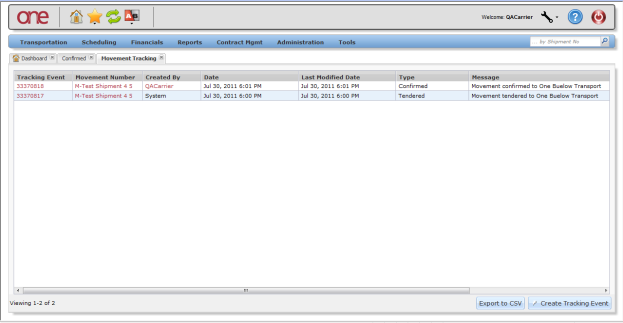

- To add a new tracking event to this movement, click Create Tracking Event button at the bottom of the page and then select one of the available tracking events from the list:

After selecting one of the available tracking events, a pop-up window is displayed for you to enter information pertaining to this specific tracking event.
Note Fields marked with an asterisk symbol * are required.

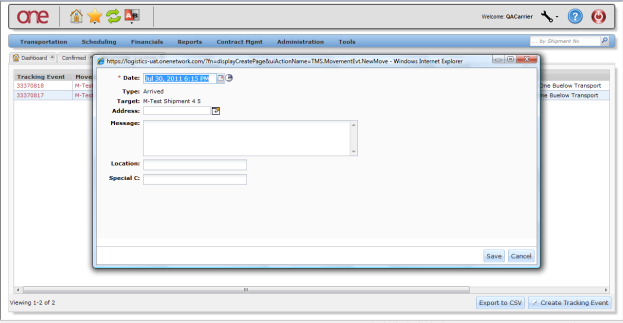
- Enter the information on the pop-up window and then click Save.
- After you click Save, a success message is displayed on the pop-up window:
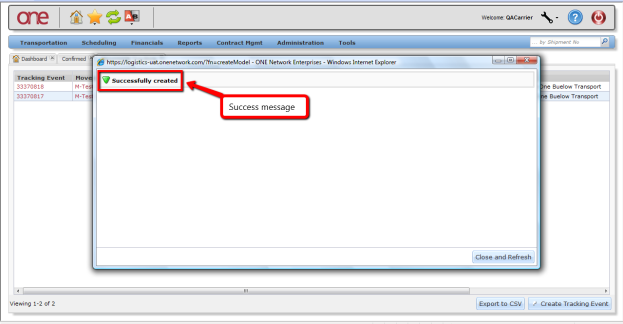

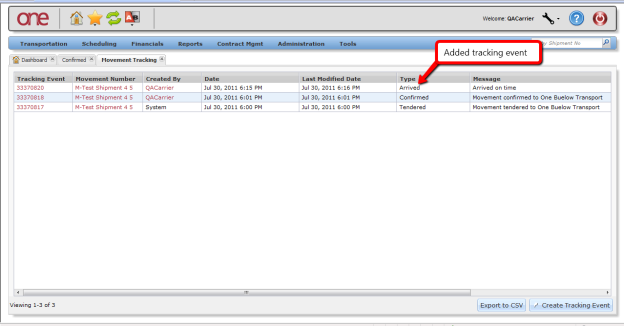
- Click Close and Refresh button on the pop-up window. You will be returned to the Movement Tracking Event page which will show the Tracking Event you just added:

To add a Tracking Event for an individual Shipment under the Movement, do the following:
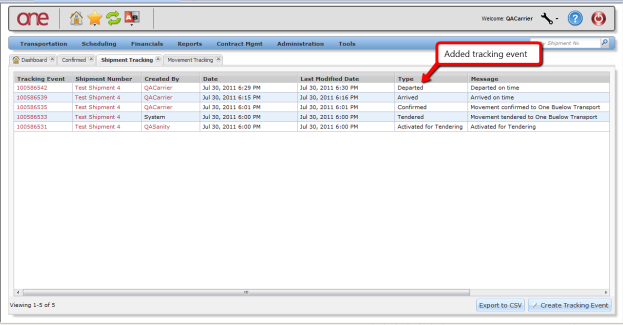
- Select the triangle symbol next to the Shipment Number and click Shipment Tracking action.
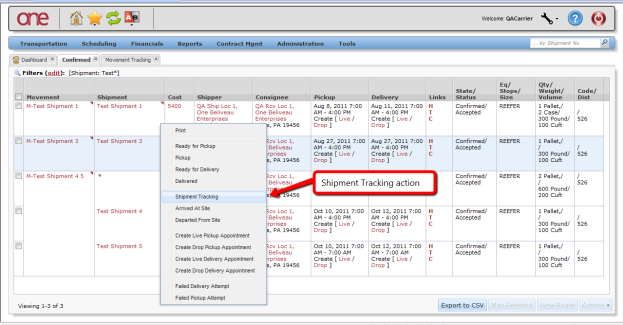
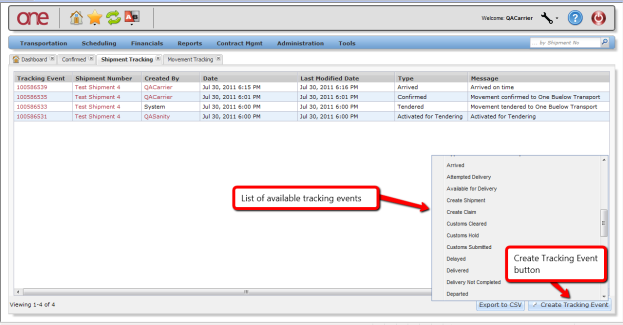
- The Shipment Tracking Event page appears, displaying the list of tracking events that are already added to this shipment.


To add a new tracking event to this shipment, click Create Tracking Event button at the bottom of the page and then select one of the available Tracking Events from the list.
After selecting one of the available tracking events, a pop-up window is displayed for you to enter information pertaining to this specific event.Note Fields marked with an asterisk symbol * are required.

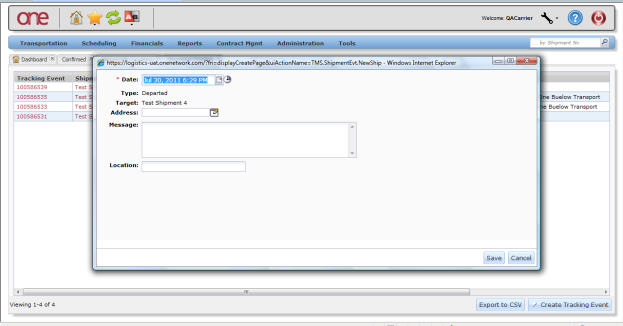
- Enter the information on the popup window and then click Save button on the pop-up window.
- After you click Save, a success message is displayed on the pop-up window.
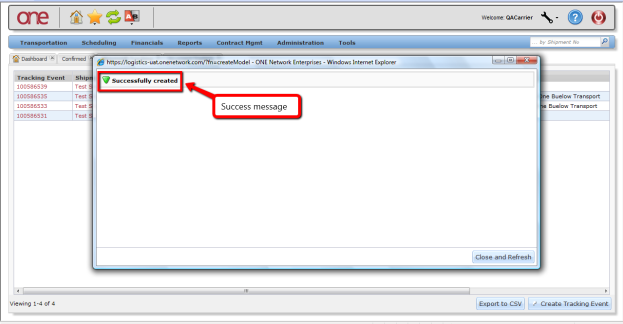
- Click Close and Refresh on the pop-up window to view the tracking event you just added. You are returned to the Shipment Tracking Event page where your new tracking event is displayed.