Quick Guide to Creating a Route |
|

Introduction
This document provides a quick guide explaining how to create a Routing Guide and Route in the One Network System.
Creating a Route
- Login to the One Network System.
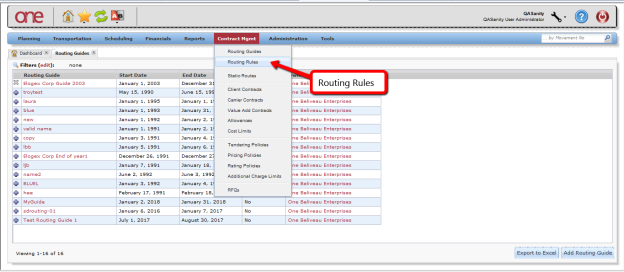
- To create a Route, a Routing Guide and Routing Rule must first be created. Select Contract Mgmt -> Routing Guides.
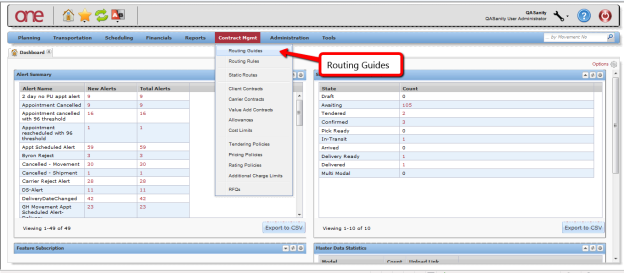
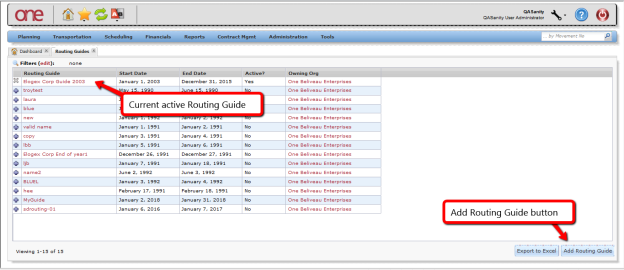
- The RoutingGuides screen will be displayed with the list of Routing Guides. Routing Guides have effective data ranges and cannot overlap each other – only one Routing Guide is active at any given time. To add a Routing Guide, press the Add Routing Guide button.
The Add Routing Guide screen will be is displayed. Fill in the information on the screen. Required fields are marked with an
...
asterisk * symbol.
Routing Guide
...
field enter the name for your Routing Guide Period
...
field enter the date range that this Routing Guide would be in
...
effectAfter the information is entered on the screen, press the Create Routing Guide button at the bottom of the screen. 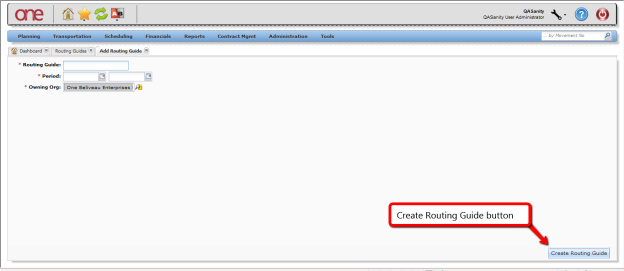
- Return to the Routing Guides screen and refresh the screen. The newly created Routing Guide will be displayed in the list.
- To add a Routing Rule, which will be needed when creating a Route, select Contract Mgmt -> Routing Rules.
- The Create Routing Rule screen will be is displayed.
...
- Fill in the information on the screen. Required fields are marked with an
...
- asterisk * symbol.
Routing Rule field - enter the name for your Routing Rule.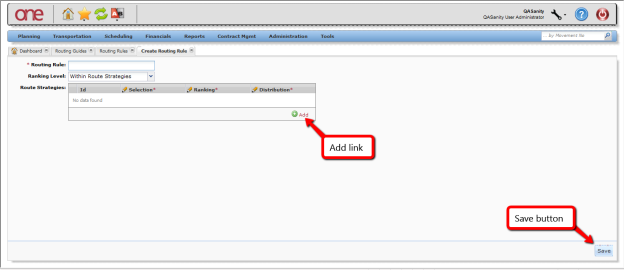
To add the necessary strategy for your Routing Rule, press the Add link.
...
Fill in the information for the Routing Strategy – click inside each field to enter the information.
...
Required fields are marked with an
...
asterisk * symbol.
Selection
...
field Select Contract from the drop down list Ranking
...
field Select a ranking option from the drop down list which includes: Carrier Priority, Least Cost, and Rotational Allocation. Carrier Priority would add the Carriers to the Shipment's Tender Plan based on the priority of the Carrier as defined on the Route. Least Cost would add the Carriers to the Shipment's Tender Plan in order of least cost as defined on the Carrier Contract. Distribution
...
field Select a distribution option from the drop down list which includes: Sequential and Broadcast. Sequential would tender shipments to the Carriers on the Tender Plan in a sequential order one by one.
...
The broadcast option tenders shipments to all of the Carriers on the Tender Plan at one time. 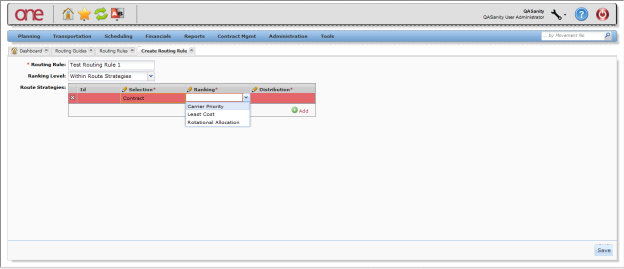
After the information is entered on the screen, press the Save button at the bottom of the screen.
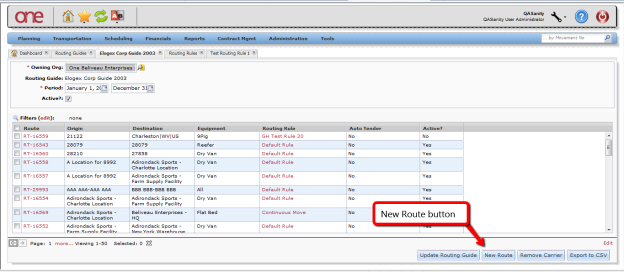
- Return to the Routing Guides screen and select the name link for one of the Routing Guides to add a Route to it.

- The Routing Guide screen for the selected Routing Guide will be displayed with the list of Routes. To add a Route, press the New Route button.
The Add Route screen will be displayed.
Fill in the information on the screen. Required fields are marked with an asterisk * symbol
...
.
Routing Rule
...
field Enter the name of the Routing Rule. This is an auto-complete field. As you start typing the name of your Routing Rule, the auto-complete function will show you the first 10 matches which you can select one from or you can continue typing to narrow down your search. There is also
...
a Search
...
icon next to this field that allows you to search for a Routing Rule. Note – once the Routing Rule is entered, the Carrier section of the screen will display accordingly. Lane From
...
and To fields Enter the "from" and "to" location information for the lane. First select the type of location from the drop-down list and then enter the name for that location. The types of locations
...
include Site, Partner Site, Country/State/City, Postal Code Range, City/Postal Code, District Range, and Region. Choose
...
the Existing Lane
...
link to choose an already-created Lane. Equipment
...
field Select the equipment type from the drop down list. 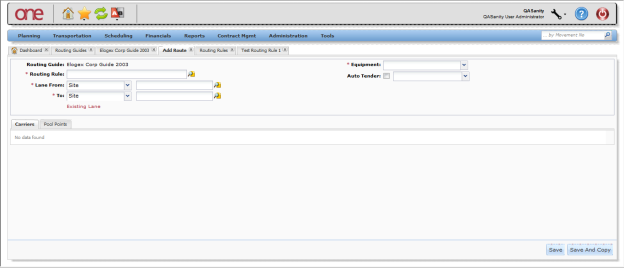
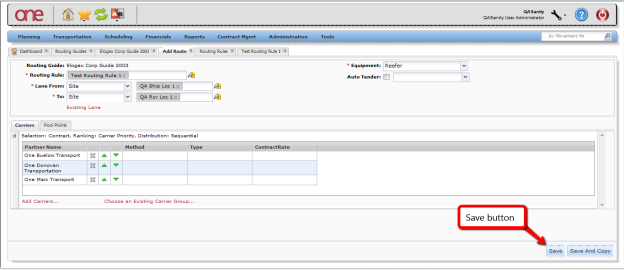
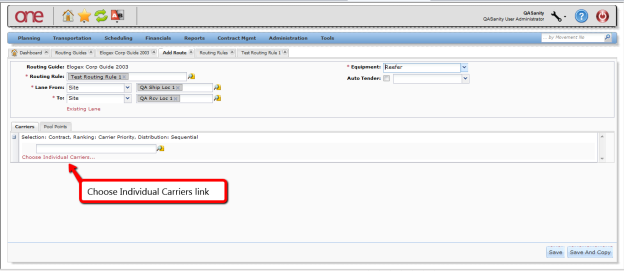
To add individual Carriers to the Route, select the Choose Individual Carriers link:
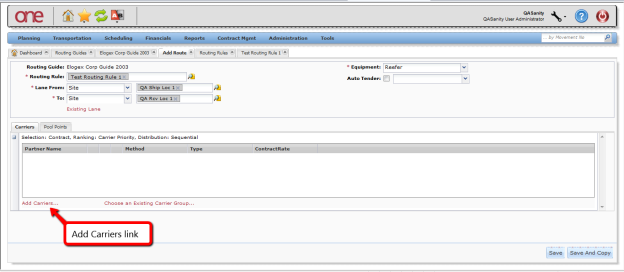
Then select the Add Carriers link:
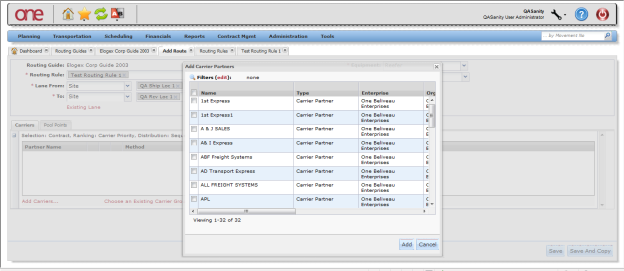
On the Add Carrier Partners popup window, select the
...
check boxes next to the desired Carriers and then press the Add button on the popup window:
After the information is entered on the Add Route screen, press the Save button at the bottom of the screen. A success message will be displayed indicating the route has been created.