...
- Login to the One Network System
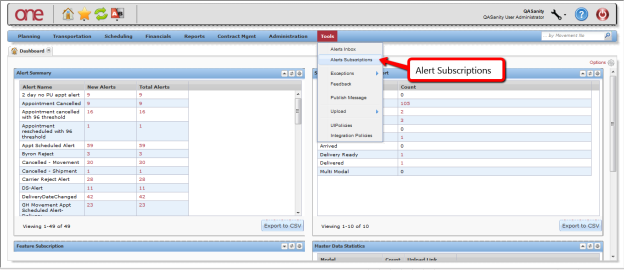
- Select Tools -> Alerts Subscriptions
The Alerts Subscriptions screen will be displayed with a list of your current alert subscriptions
To subscribe to a new alert, press the Add Alert Subscription button: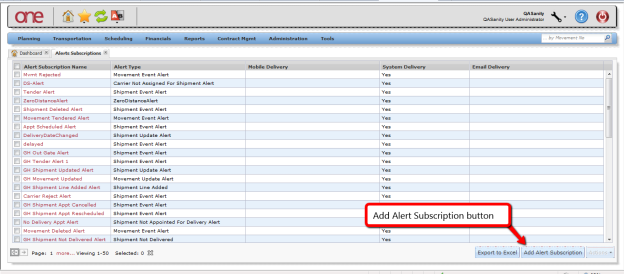
Note To view or edit the details for an alert subscription, select the Alert Subscription Name link on the screen.
After pressing the Add Alert Subscription button, the New Alert Subscription screen will be displayed. This screen is divided into 3 sections: Alert Information, Alert Type, and Alert Filters. The Alert Filters section will change depending on what type of alert is selected in the Alert Information section

Enter and select information in the Alert Information section of the screen
Note Fields marked with an asterisk symbol ( * ) are required.
Subscription Name field - enter a name for your alert
Category field - select one of the available categories from the Category drop-down field. If you want to subscribe to an alert based on the Movement or Shipment, select the Movement or Shipment category option.
Alert Type field – once you select a Category option, the list of corresponding Alert Types will be available. Select one of the available alert types from the Alert Type drop-down field. If you selected the Shipment Category, you can pick a specific alert such as Shipment Not Delivered or you can pick a general type of alert such as Shipment Event Alert which you would then specify the event for this alert in the Alert Filters section of the screen.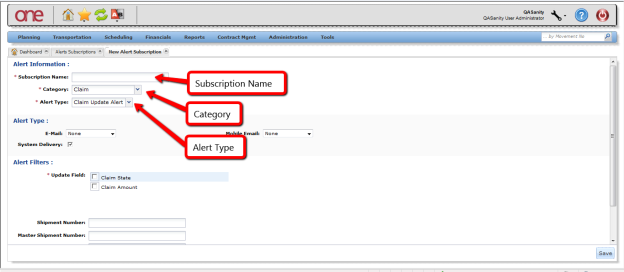
Enter information in the Alert Type section of the screen. This section allows you to send this alert to two different email addresses as well as to send the alert to the system so you can see it within the application.
For the E-Mail field, select one of the selections from the drop down list – None, Email, or Alternate EmailNote If you select the Email option from the drop down list, it will default to the email address specified for your username. The Alternate Email option from the drop down list will allow you to enter any email address.
For the Mobile Email field, select one of the selections from the drop down list – None, Email, or Alternate Email
Select the checkbox next to the System Delivery field if you want the alert to be seen in the application under your Alert Inbox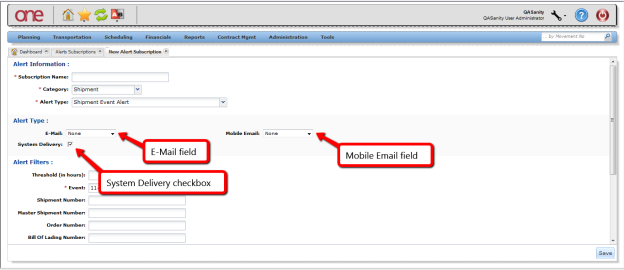
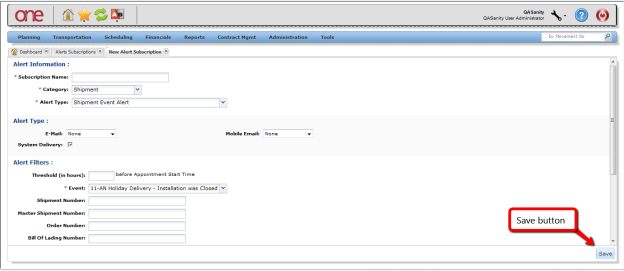
- Enter information in the Alert Filters section of the screen. This section allows you to specify certain filter criteria that needs to be met for this alert. For example, the Alert Filters section may include a Ship From Site field (depending on which alert type you selected). You could then specify a Ship From Site which means you would only get this alert for Shipments that contain this Ship From Site.
- Once all the information has been entered on the New Alert Subscription screen, press the Save button on the bottom of the screen. You will receive a message on the screen that the alert was successfully created.
- Once an alert is triggered, you will get an email message to the email address you specified on the alert plus the alert will be sent to the system if you selected this option
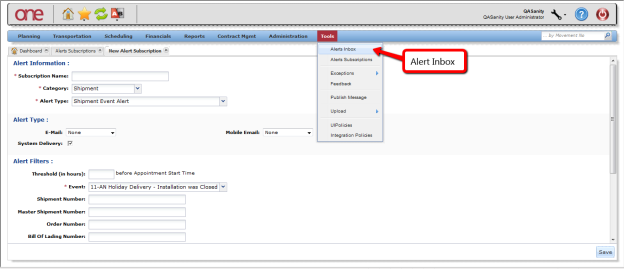
- To view alerts sent to the system, select Tools -> Alert Inbox
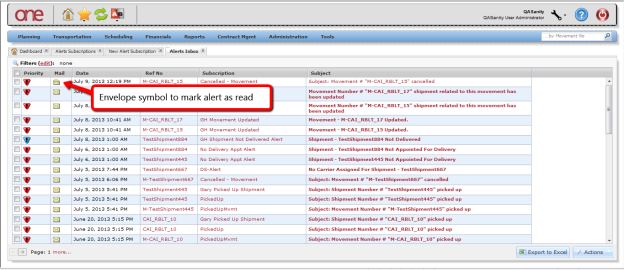
- The Alert Inbox screen will be displayed with a list of alerts that were sent to the system (Note – this would be for the alerts that you checked this option). The screen will list the date the alert was sent as well as the name of your alert. You can filter and search for specific alerts by selecting the "Filters (edit)" link, entering filter information and then pressing the Search link.
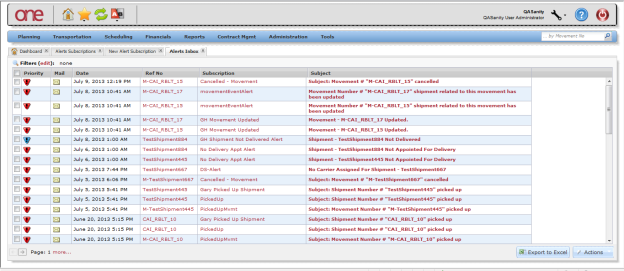
- On the Alert Inbox screen, you can mark an alert as "read" by selecting the envelope symbol for the alert. The envelope symbol changes to an open envelope to signify to you that you have already read and acknowledged this alert.
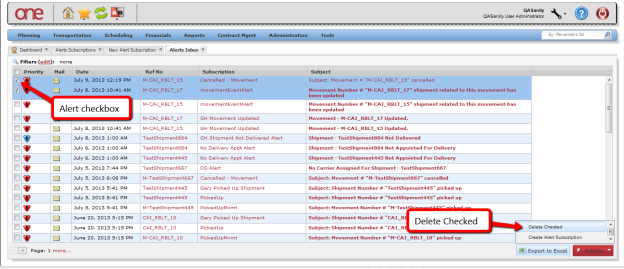
- To delete alert messages, select the checkboxes next to the alert messages and press the Actions button and select Delete Checked:
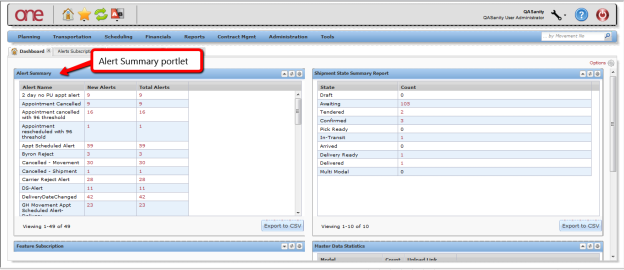
- Another way to view the alerts sent to the system is to add the Alert Summary portlet to your Dashboard. This Alert Summary portlet lists the name of the alert and the count or number of each of this alert – the count is displayed under the New Alerts column and the Total Alerts column. The New Alerts column will show you a count of the alerts you have not marked as "read" while the Total Alerts column will show you the total number of this alert (i.e. read and not read). You can select the count link for any alert to see the specifics for that alert.